This article explains how to generate a diagnostic report in Xenett Pulse for your very first client.
Creating your first diagnostic report in Xenett Pulse is simple. In just a few steps, you can generate a professional review report that helps identify accounting issues and present valuable insights to prospects or clients.
This guide walks you through the complete setup and report generation process.
Step 1: Download the Browser Extension
The Xenett Pulse Browser Extension pulls bank reconcilation data and pending bank feed transactions details directly from QuickBooks as it is not available through API. Hence, it is very important to download the extension.
You may download it from here.
Step 2: Upload Your Firm Logo
Before generating reports, upload your firm branding so exported reports look professional and client-ready.
To upload your logo:
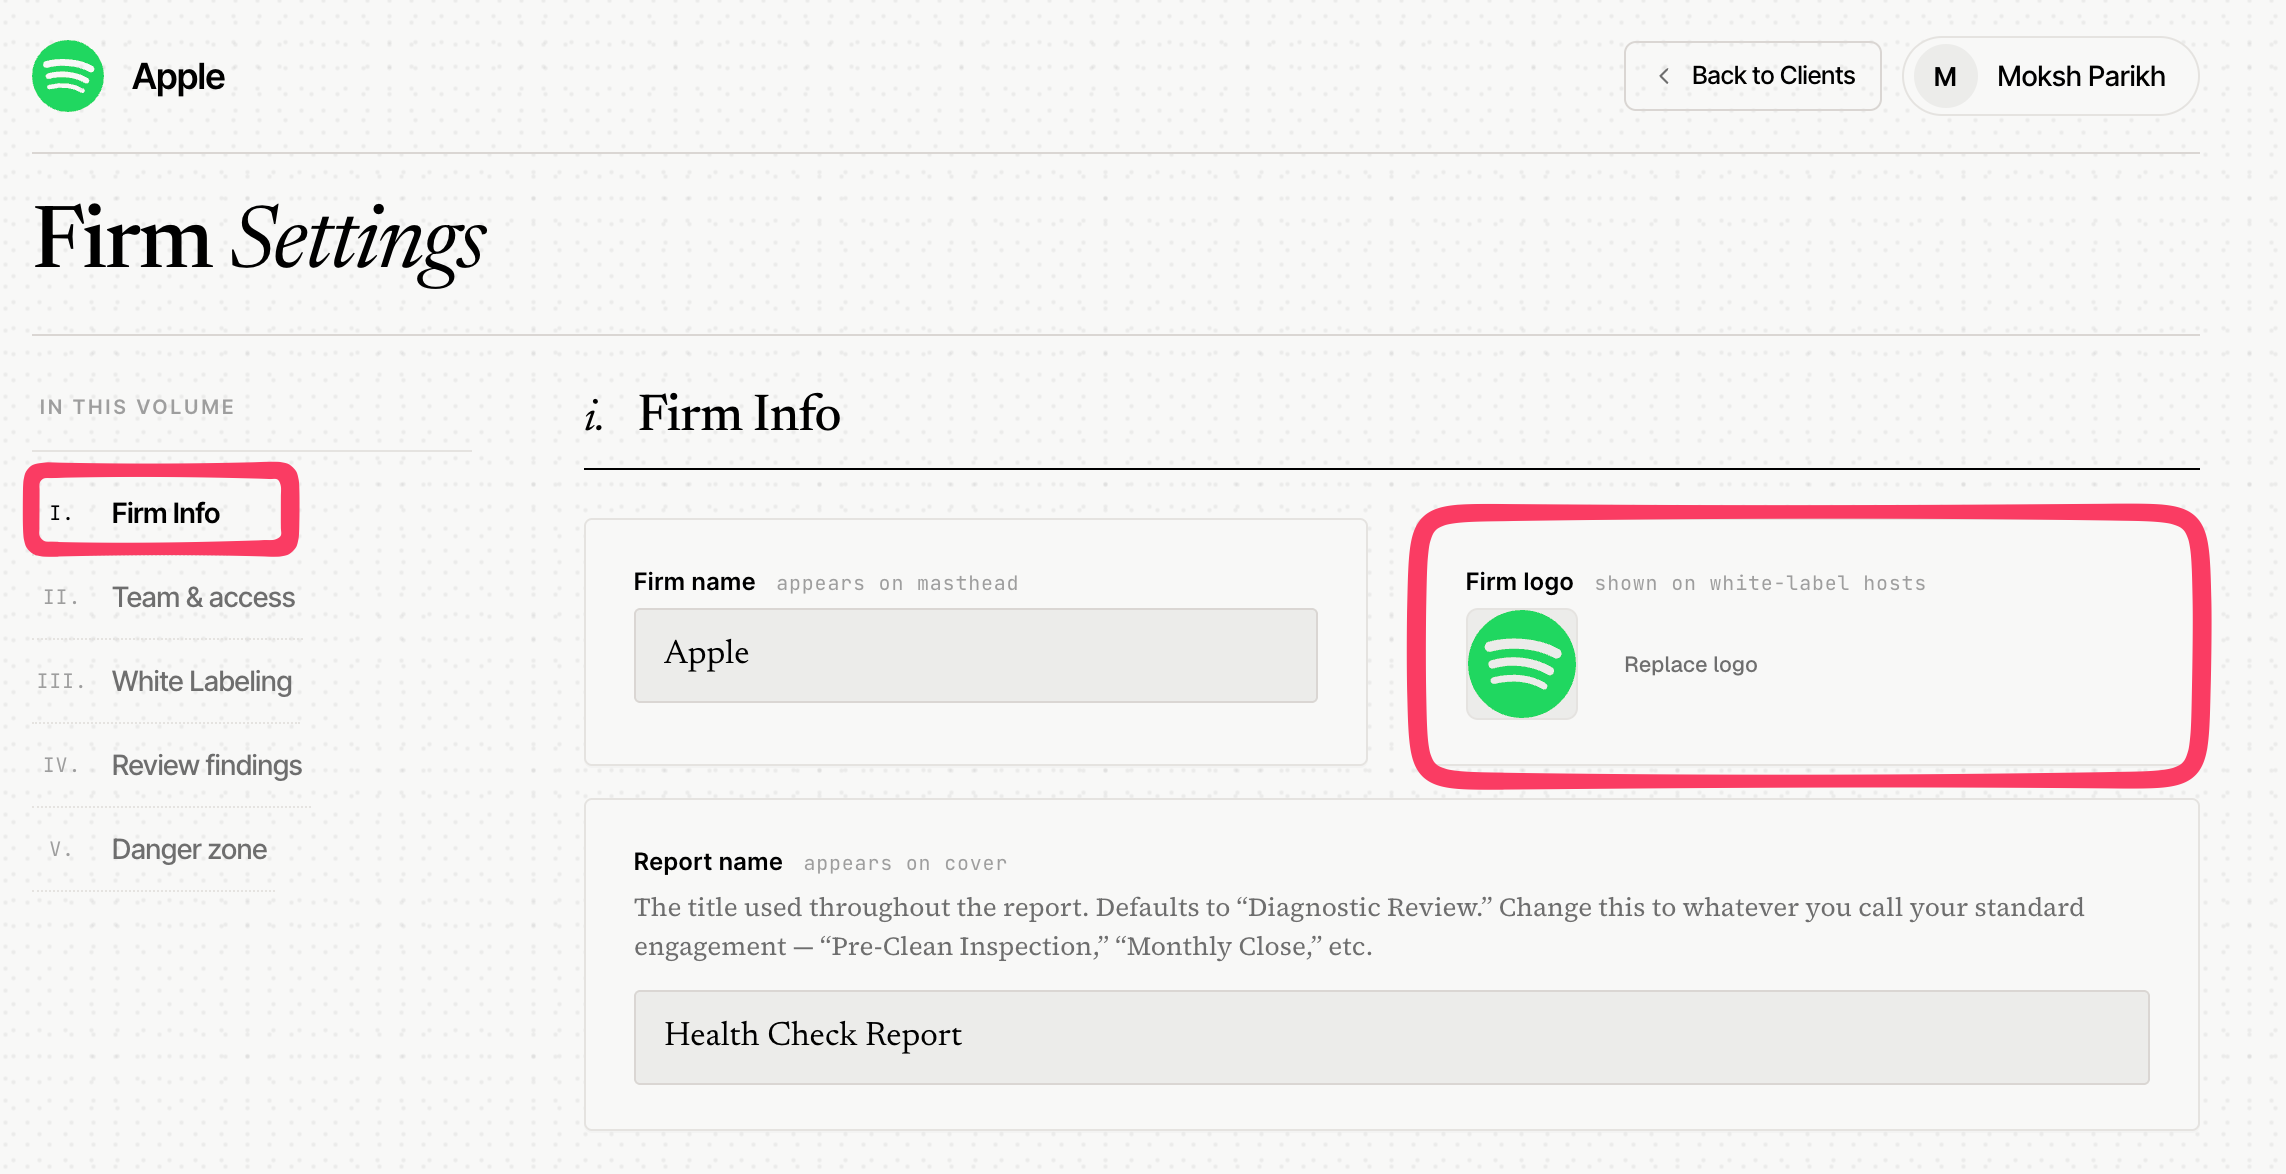
Go to Firm Settings
Open the Firm Info section
Upload your firm logo
Your logo will automatically appear on exported reports and PDFs.
Step 3: Add Your QuickBooks Client
Next, connect the client’s QuickBooks Online account.
To add a client:
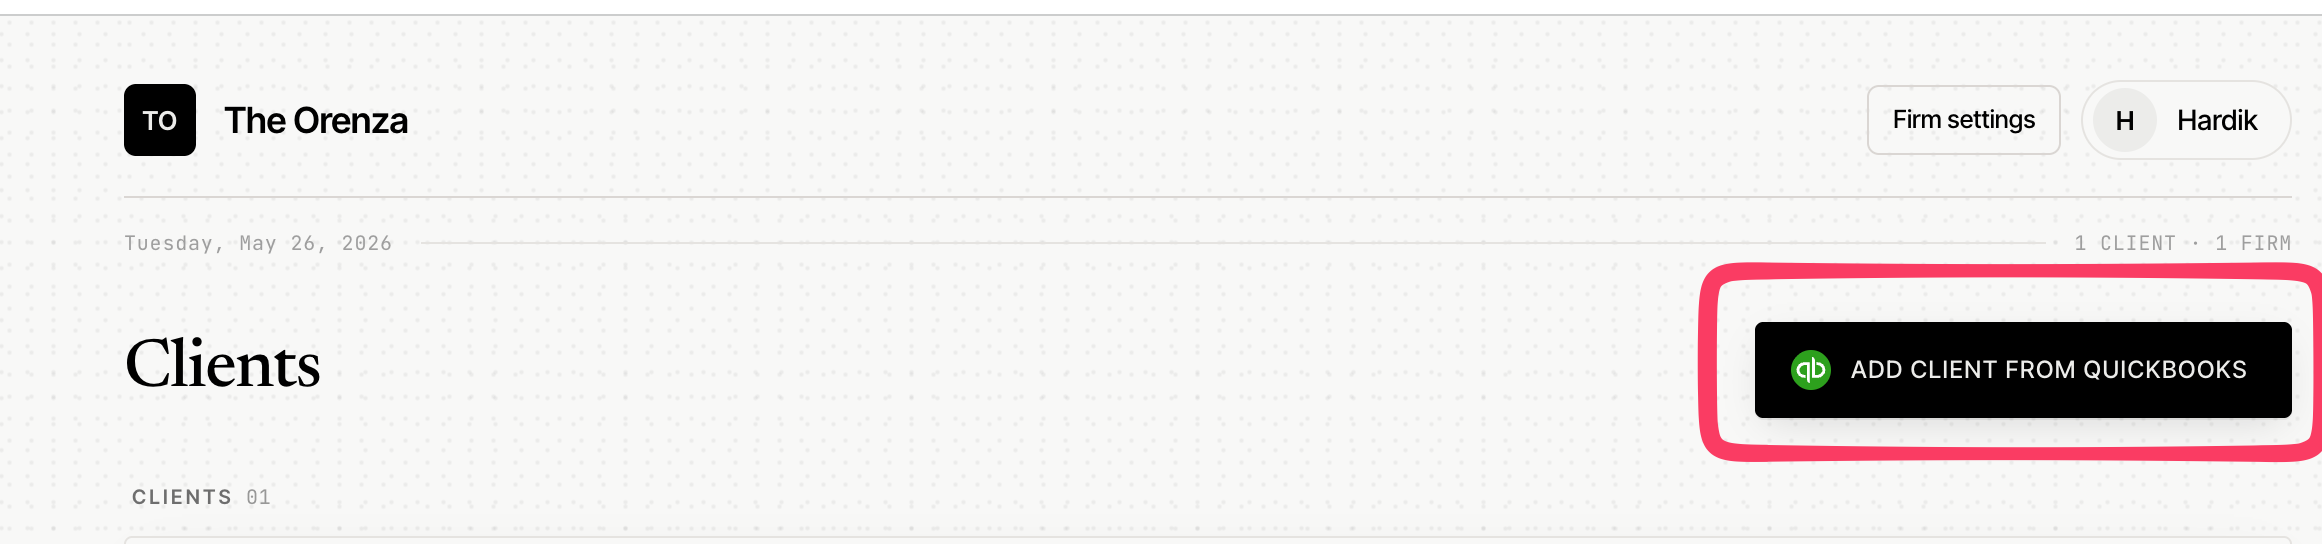
Click Add Client
Connect the QuickBooks account
Select the QuickBooks company
Wait for the data sync to complete
Xenett Pulse will automatically analyze the accounting data and generate diagnostic findings.
Step 4: Select the report period
As you add the client, it will ask you to select the report period. This is the period that will be used by Xenett Pulse to analyze the client’s data for the report preparation. This period can be changed later.
Step 5: Upload the Client’s Logo
Adding the client’s logo helps create a more personalized and professional report presentation.
To upload the client logo:
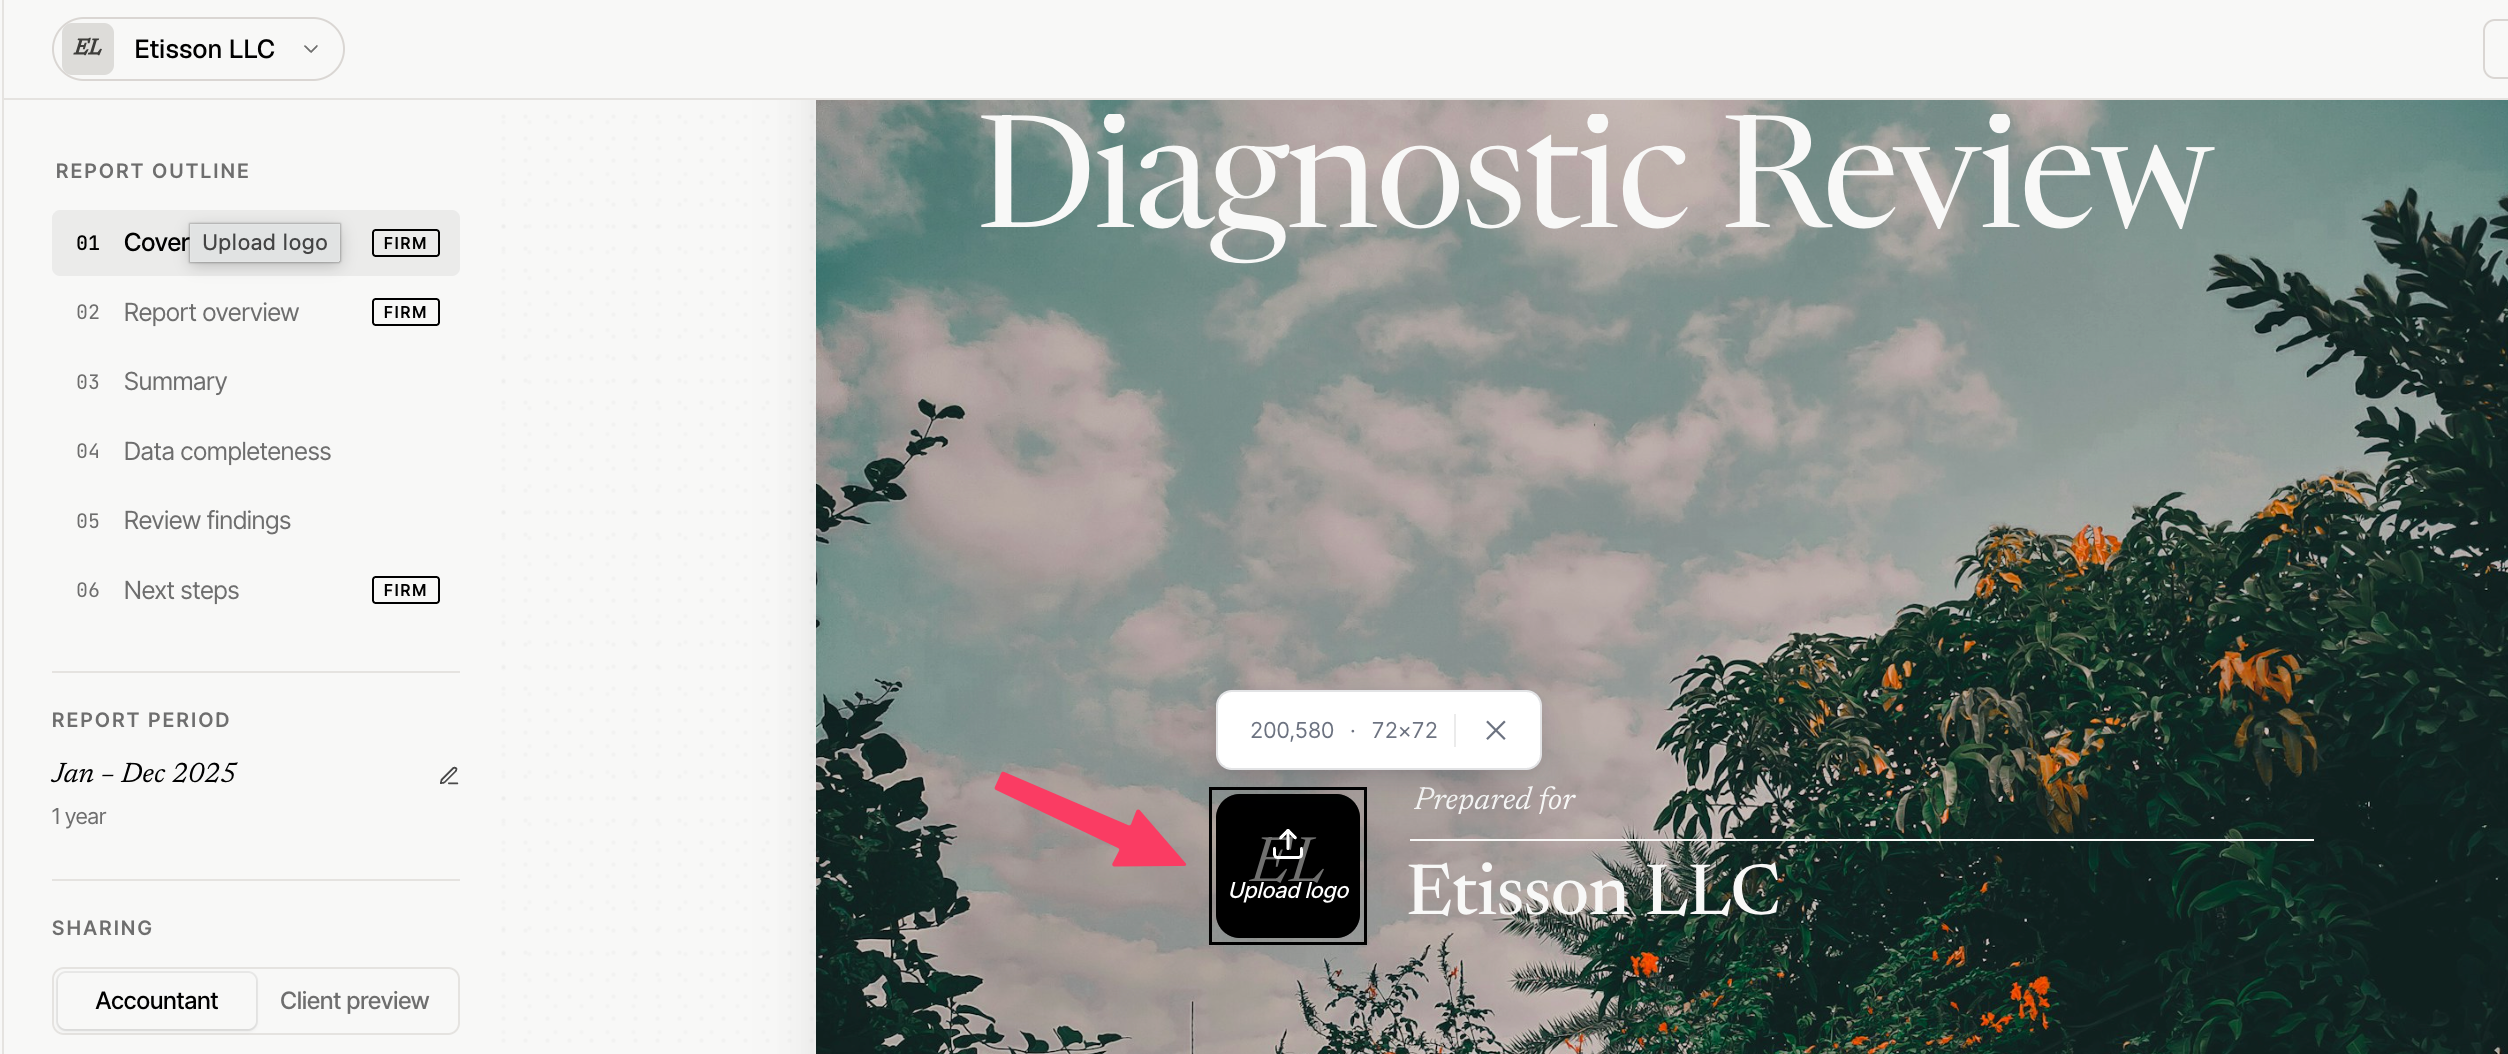
Inside Client, Go to Cover page
Upload the client logo
The logo will appear in the exported diagnostic report.
Step 6: Review Findings and Add Notes
Once the analysis is complete, Xenett Pulse will generate review findings across different accounting areas.
Examples may include:
Uncategorized transactions
Reconciliation issues
Negative balances
Duplicate entries
Payroll inconsistencies
Accounts receivable/payable concerns
You can customize the report by:
Adding notes or remarks
Including recommendations
Hiding unnecessary findings
Adjusting visibility for client presentation
This helps you tailor the report based on the client’s situation and your firm’s recommendations.
Step 7: Export and Print the Report
Once your review is complete:
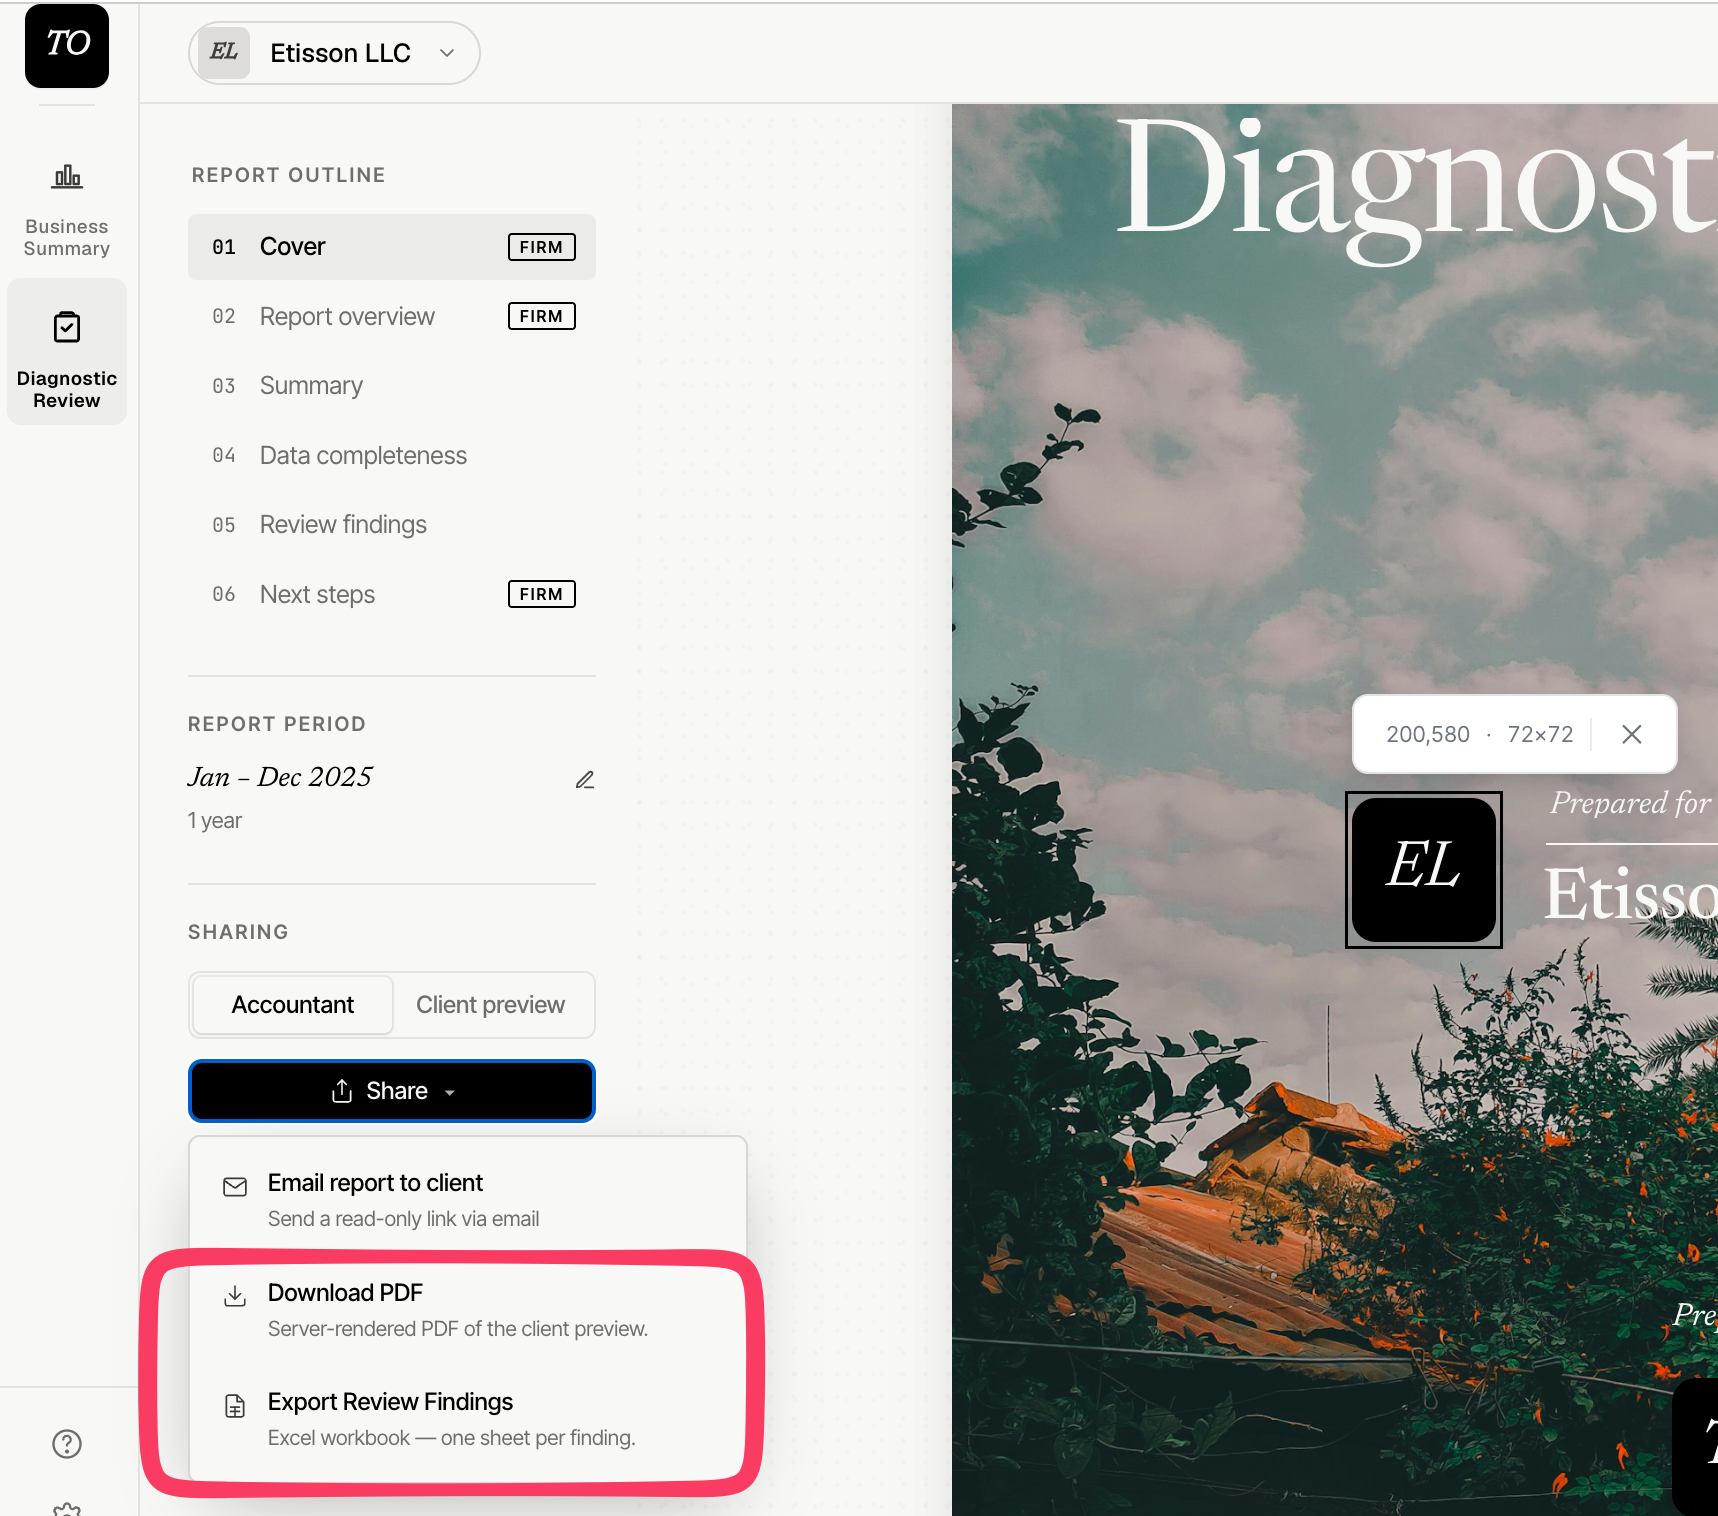
Click Export
Choose your preferred format:
PDF Report
Excel Findings Export
Download the report
Print or share it with the client
The final report is designed to help accounting firms present findings clearly and professionally during sales discussions, cleanup proposals, or onboarding conversations.
Watch this getting started video
Best Practices
Keep client-facing reports focused on high-impact findings
Add clear remarks that explain why issues matter
Use branding to create a polished presentation
Review the final PDF before sharing externally
Refresh QuickBooks data if recent changes were made
Common Questions
Do I need the browser extension?
Yes. The browser extension is recommended for the best review experience and additional QuickBooks-related insights.
Can I customize findings before exporting?
Yes. You can add remarks, hide findings, and control what appears in the final report.
Can I regenerate the report later?
Yes. Simply refresh the QuickBooks data and export an updated version anytime.
Can I export the findings into Excel?
Yes. Xenett Pulse allows exporting review findings into Excel for further analysis or internal use.